
How to Make Easy Sushi at Home
I'm obsessed with Sushi! I love trying anything in the realm of sushi, sashimi, nigiri and much more!
Being pregnant and unable to have sushi was rough! Because raw salmon is THE BEST! It melts in your mouth! Totally opposite than cooked salmon!
Sushi doesn't always have to contain raw fish... or any fish at all actually! Cooked fish does the job! Not timid on exploring the world of Sushi.
The cost of sushi can be quite expensive when ordering out. I make my own sushi at home and it saves tons of money!
Plus, it isn't that scary to create perfect rolls with the right tools!
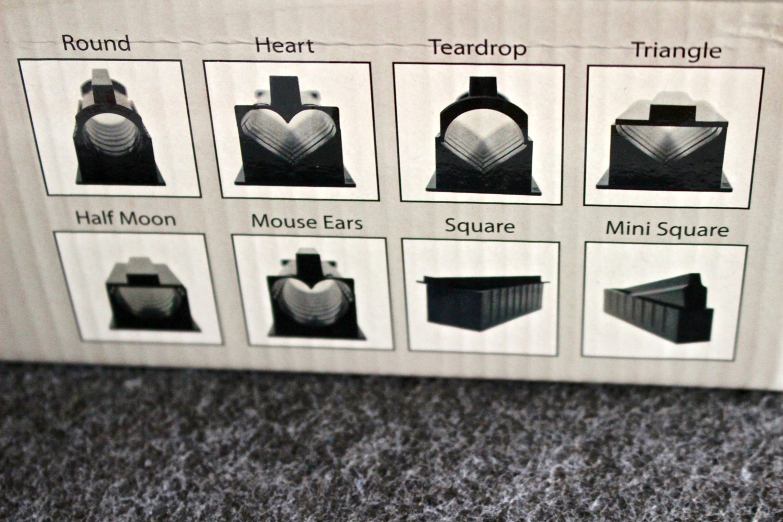
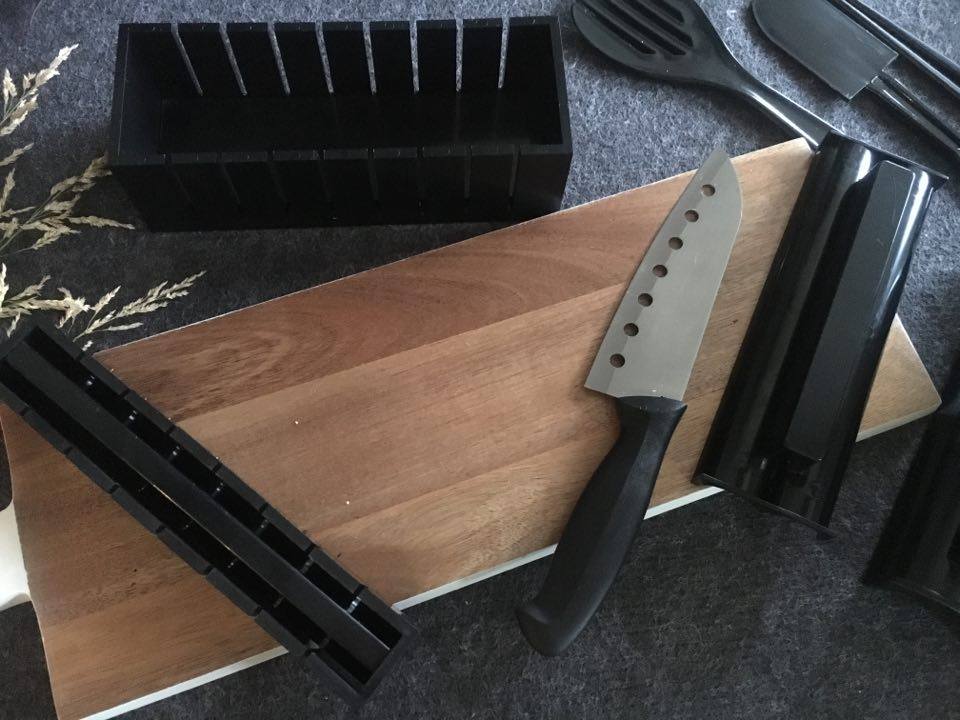
#1 Get a Sushi Kit!
It molds into 8 Different Shapes (My favorite is the HEART Mold!) and comes with:
- 1 Knife
- 1 Spatula
- 1 Serving Fork
- 2 Sets of Chopsticks
- 2 Sauce Dishes
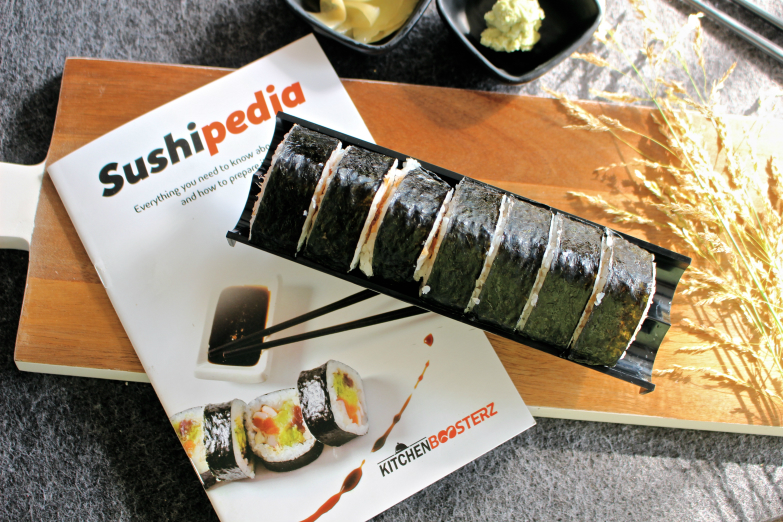
- A Step-by-Step Instruction Book!
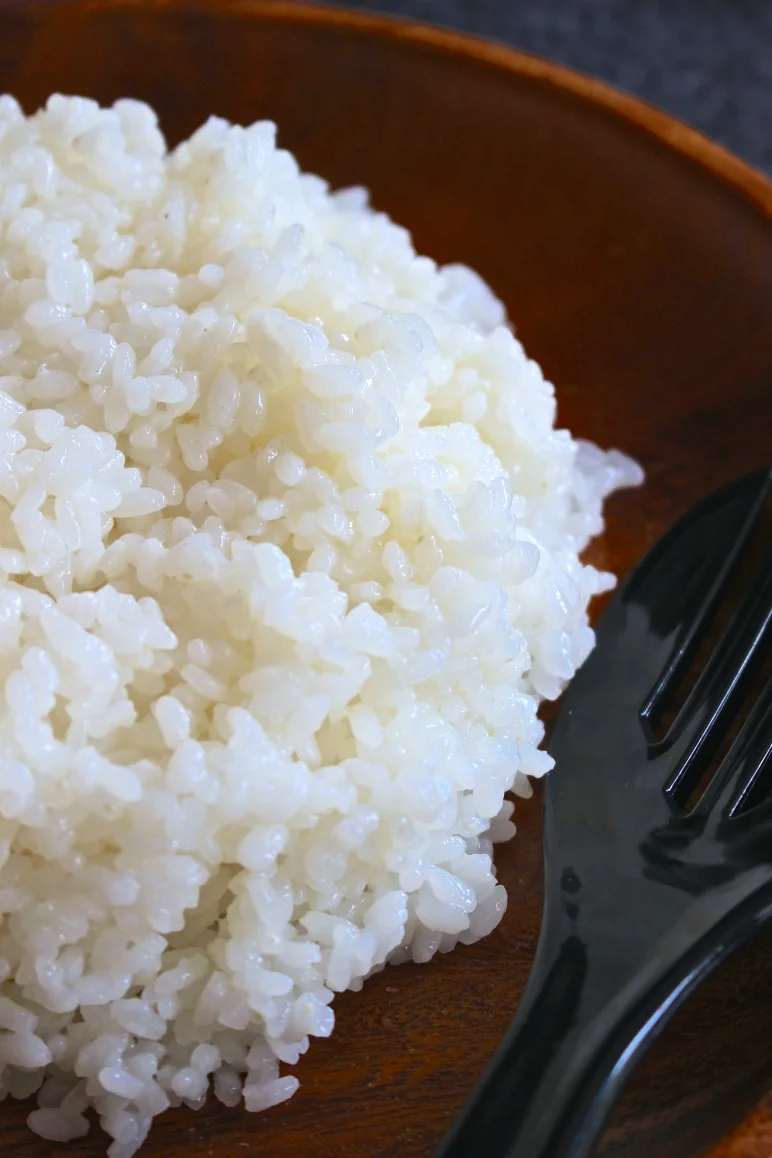
#2 Make Sushi Rice
Most people think that Sushi means raw fish. WRONG!
The rice is what puts the word "Sushi" in Sushi with it's tart/sour tasting flavor
For starters, the rice must be a very SHORT GRAINED RICE and cooked in equal parts water PLUS 1/4 Cup water for the pot.
Ex. 1 Cup Rice + 1 Cup Water + 1/4 Cup Water (for pot)... 2 Cups Rice + 2 Cups Water + 1/4 Cup Water... 4 Cups Rice + 4 Cups Water + 1/4 Cup Water... ETC.!
Once the rice is cooked, you add a special seasoning liquid made from Rice Wine Vinegar, Sugar, and Salt! This is the Tart/Sour effect.
All these elements will give you super sticky rice that you won't wont to touch very often, or it will stick to you. Instead grab your rice with a utensil to spread it.
Note: Remember to wash your rice at least 8 times until the water runs clear, this should help keep your rice from being way to sticky!
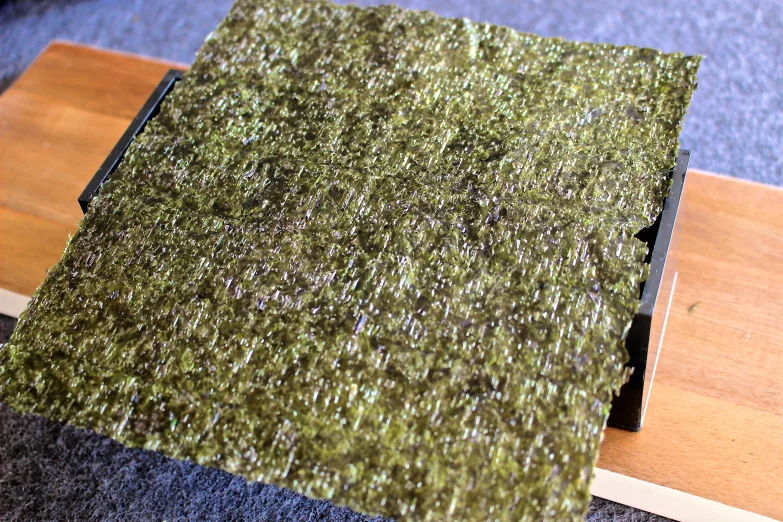
#3 Grab your NORI (Edible Sushi Seaweed)
Nori is going to hold your sticky rice and other yummy ingredients together while forming the famous Sushi rolls we all know and love!
Make sure you get the right Nori!
It should be Dried, Pre-Roasted, and Ready to use! :-D
#4 Grab Your MEAT or Veggies OR BOTH!
Depending on if you are a Vegetarian, Meat eater, or not so thrilled about the thought of raw anything... Choose your fillings to your liking!
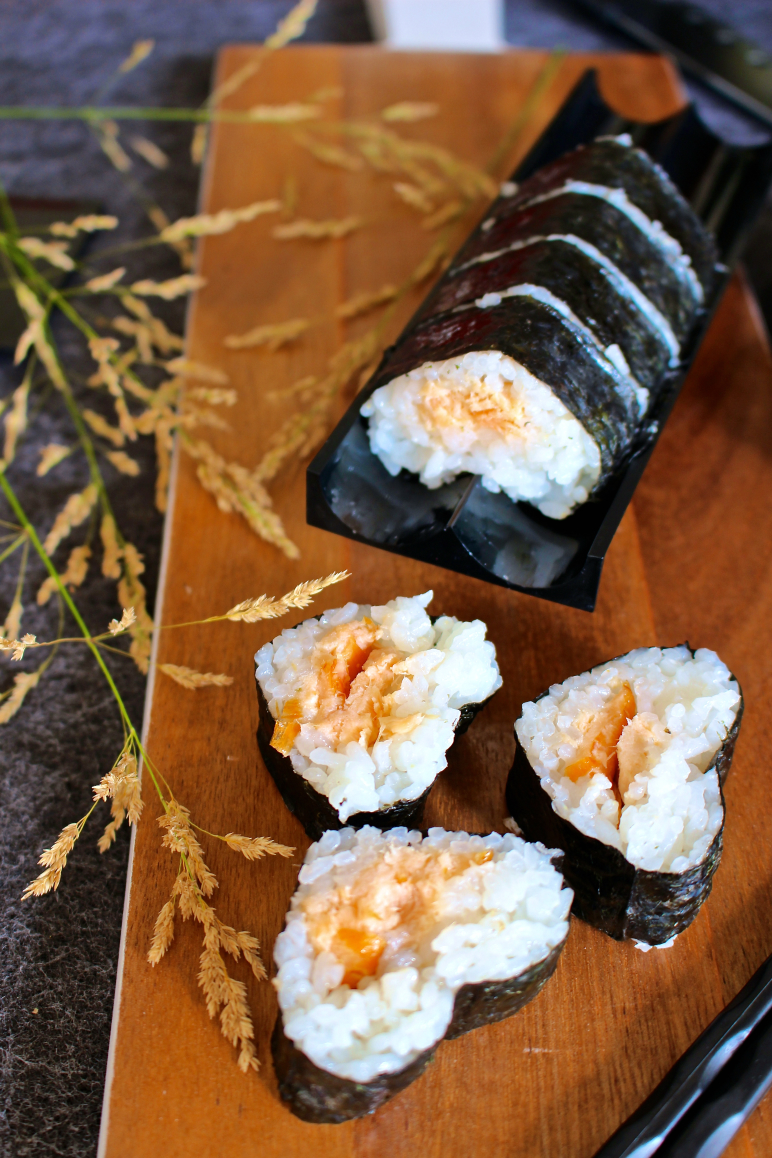
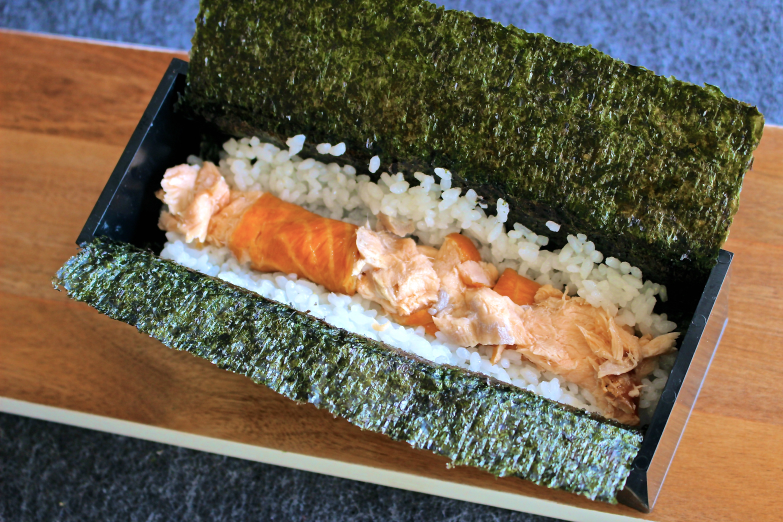
If your on the not to thrilled about raw list, try Smoked Salmon! Which is pictured below!
In order for my family to eat my sushi, they will eat the smoked salmon in a heartbeat!
The salmon pictured was cut in half the long way and stretched to make 4 hefty rolls!

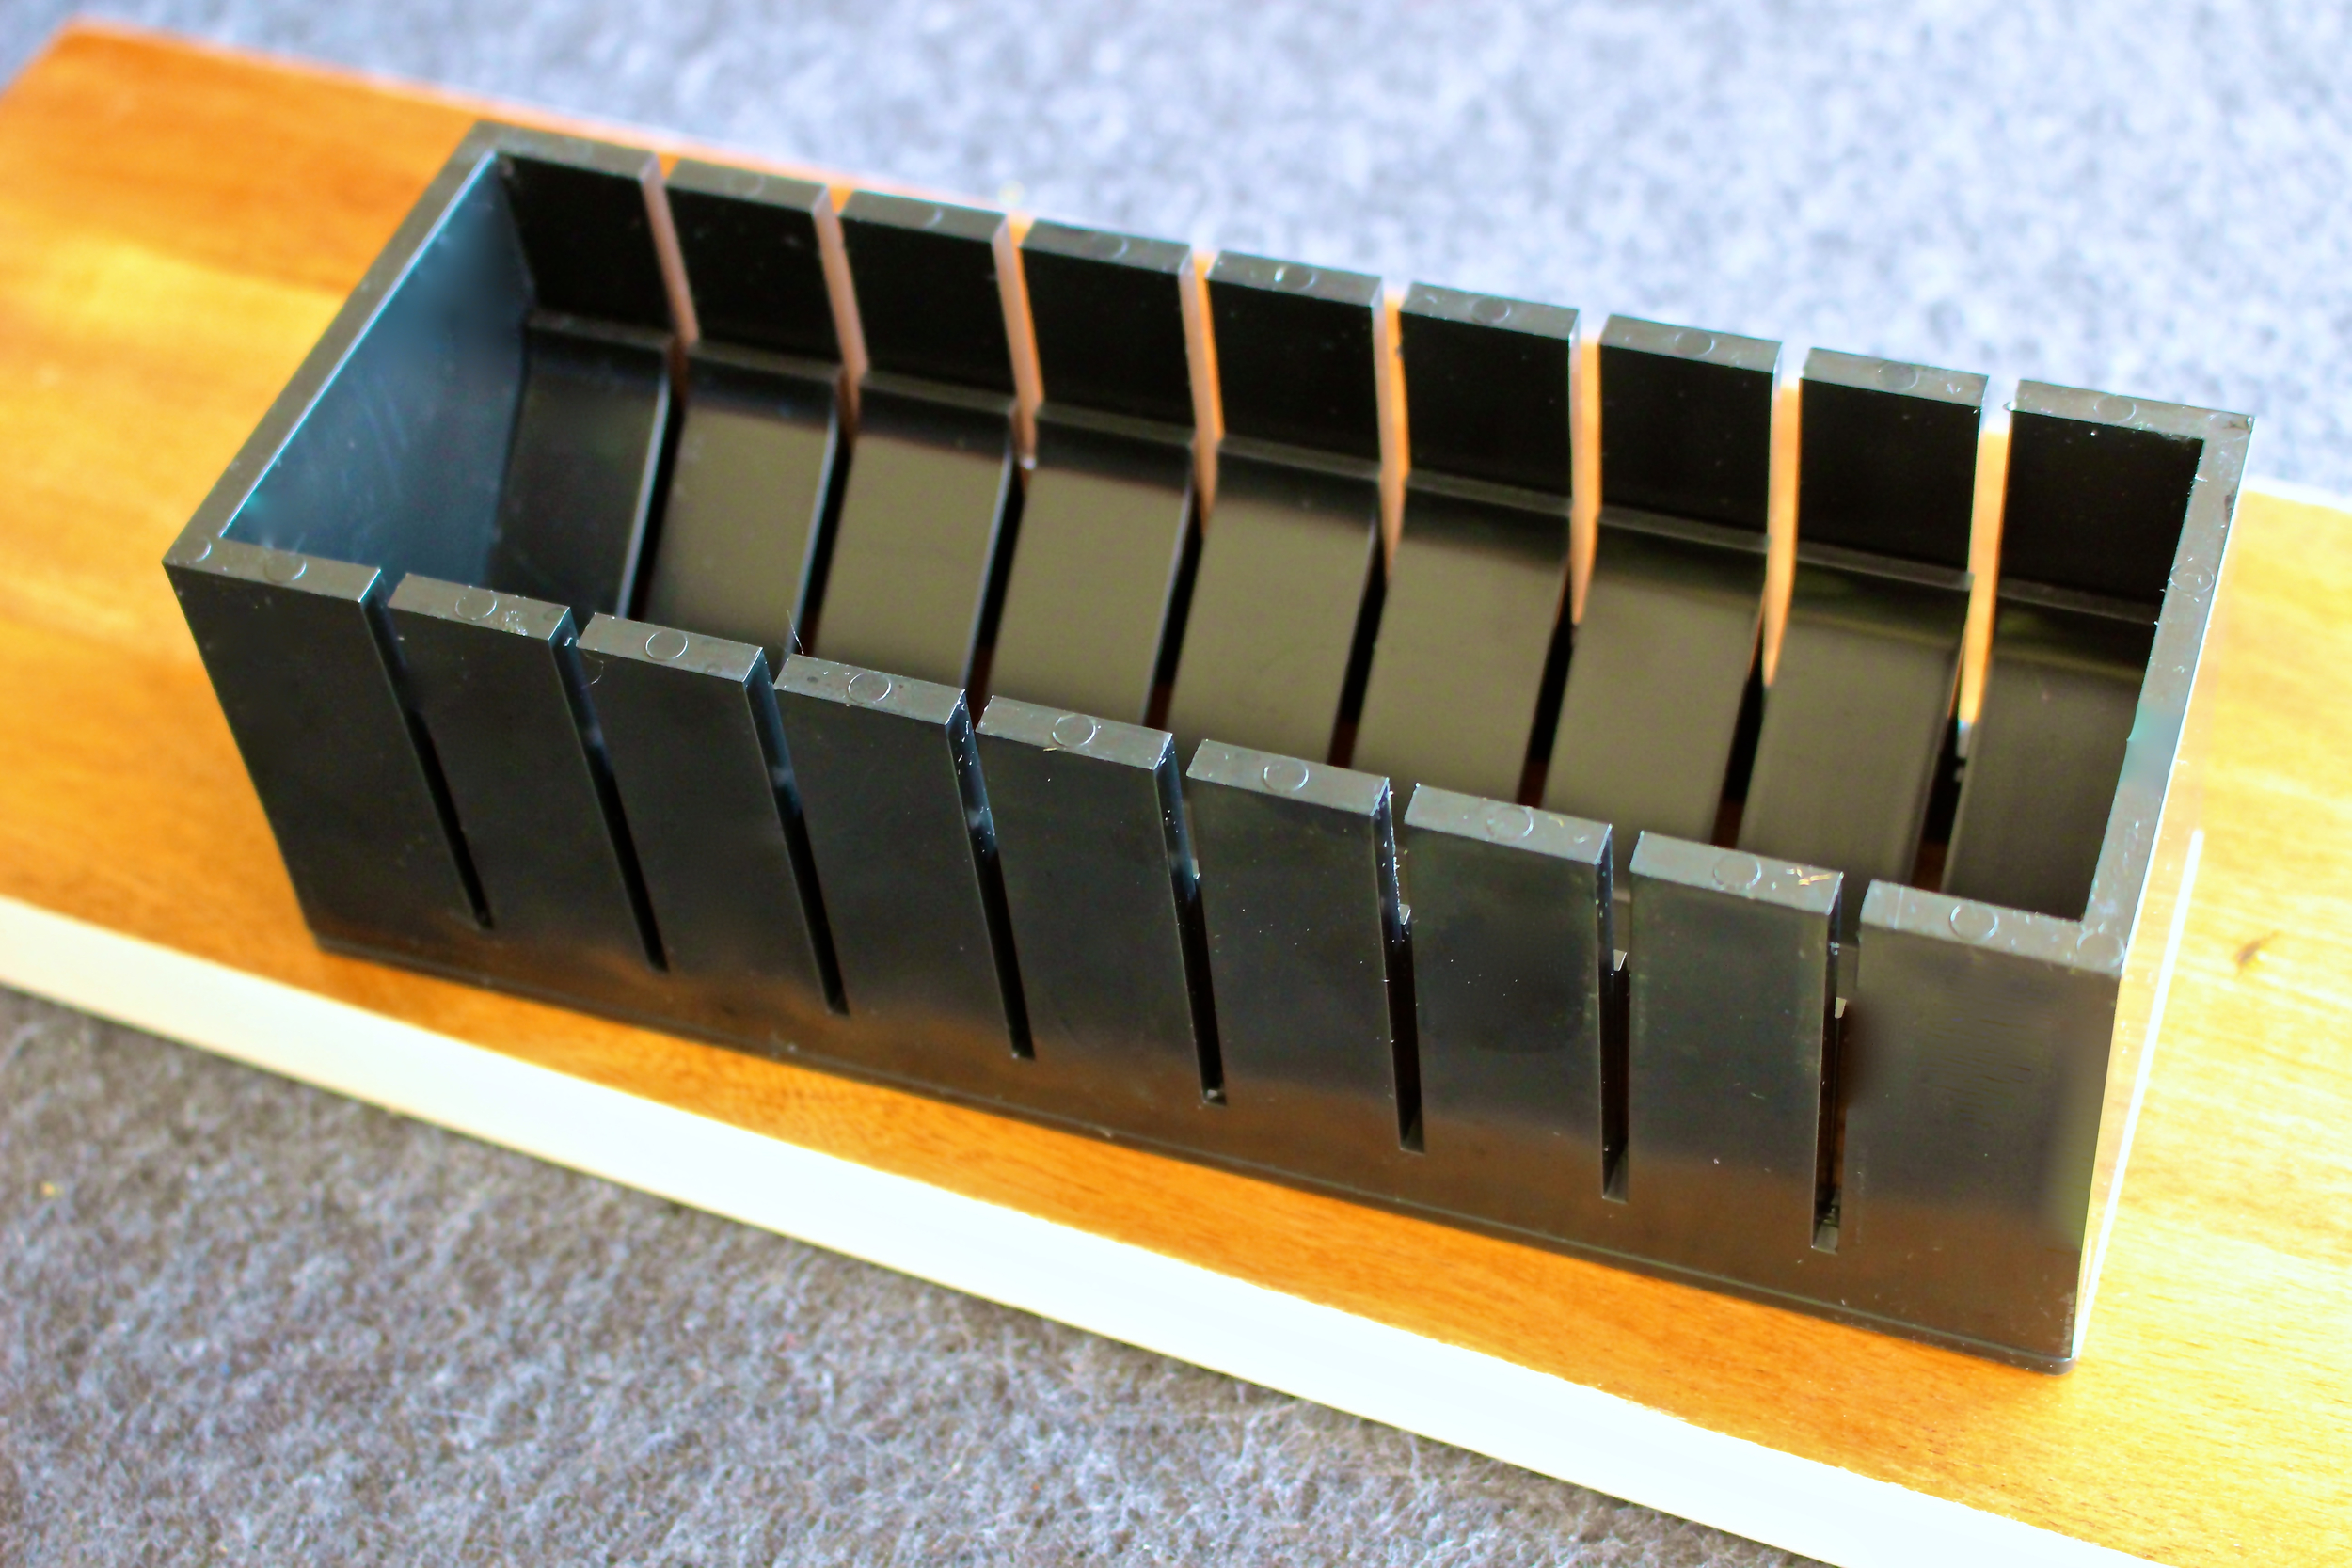
#5 Put it All Together!
If using a DIY Sushi Kit, Making Sushi will be a Breeze! You can choose to eat sushi any day of the week without spending a fortune!
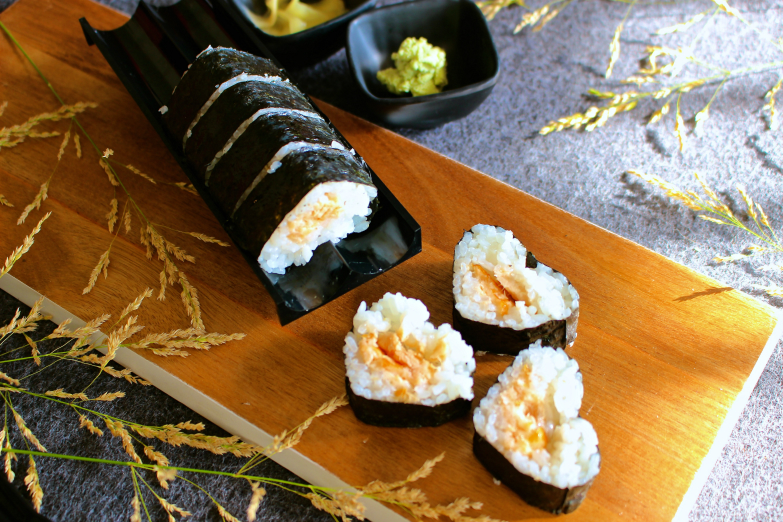
- Assemble desired shape + Frame (Pictured is Heart Shaped!)
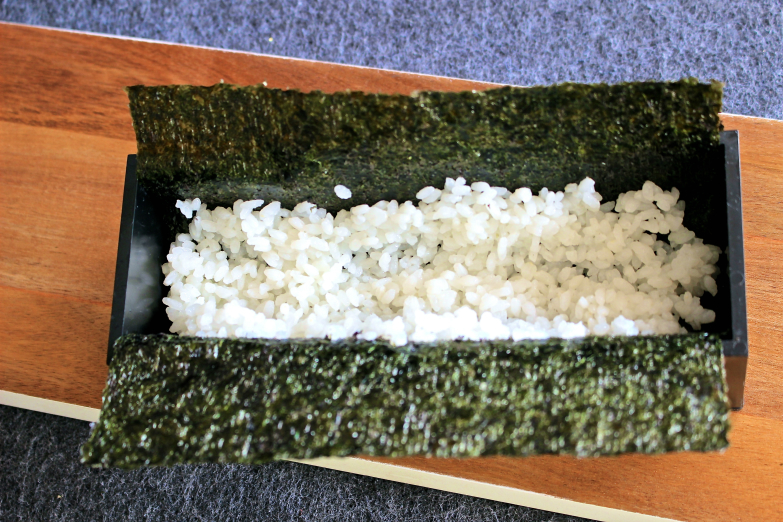
- Add Nori rough side up into desired sushi mold
- scoop 1/4 cup cooked sushi rice into mold and flatten it
- Place desired Ingredients on top of rice layer directly in the middle (do not over fill!)
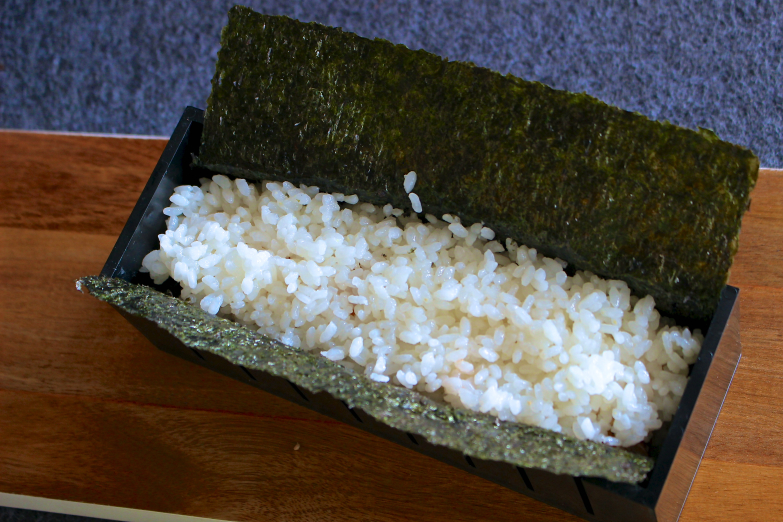
- Add 1/4 cup cooked sushi rice on top. Pressing rice firmly together
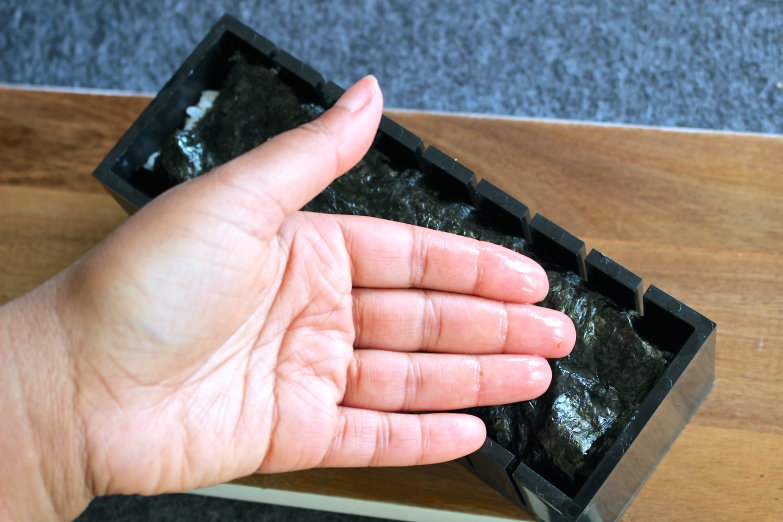
- Carefully fold one side of Nori on top of the rice.
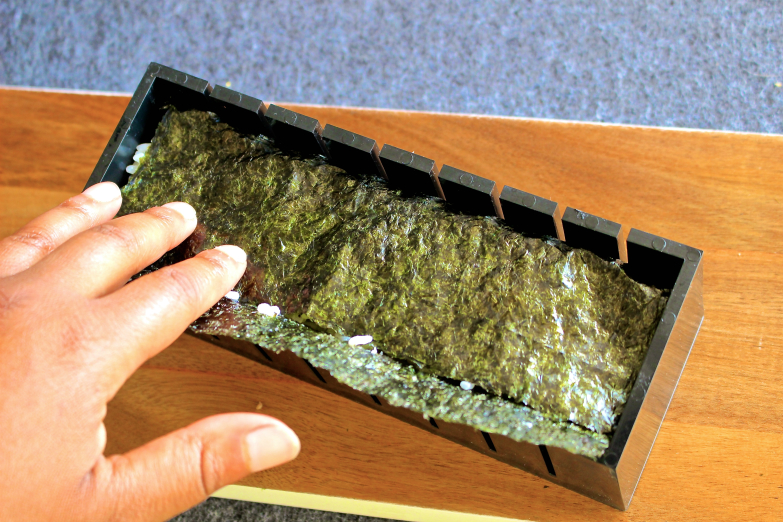
- Moisten fingers with water and wipe the water onto the Nori like a postal letter!
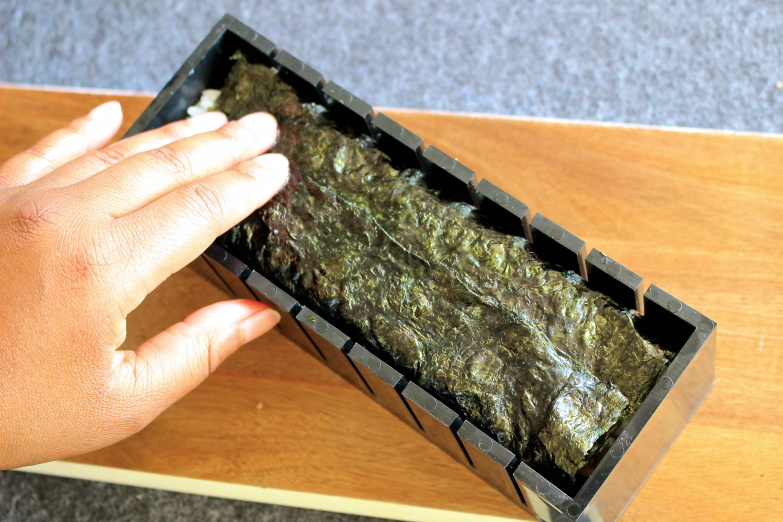
- Repeat with other side of Nori so that they stick together
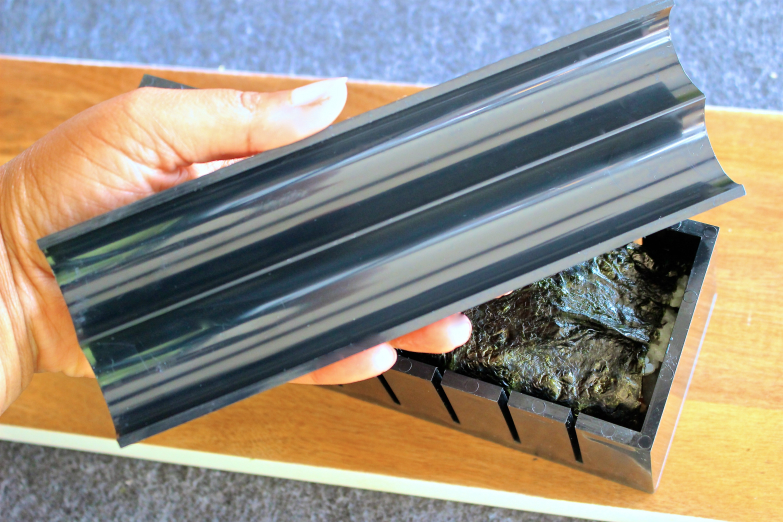
- Use the desired cover mold of choice and press down on the sushi roll
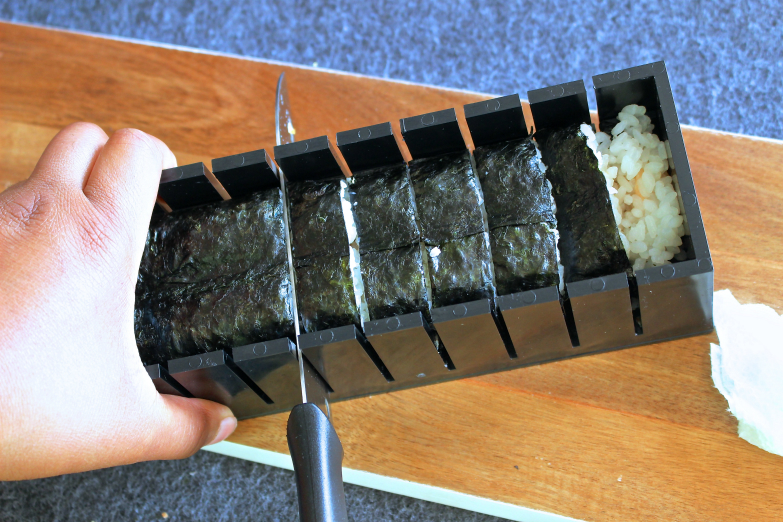
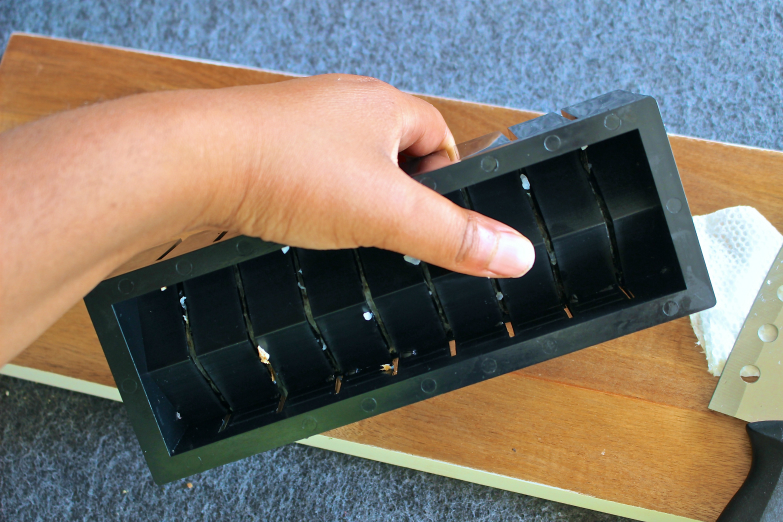
- Remove cover and slice the sushi roll within the slicing guide lines, while holding the rest of the roll
- After the whole roll is cut, place the top cover mold on top of roll to keep in place while flipping the entire structure over
- Remove frame off of the mold shape base by pulling up on the frame
- Then remove the base to revel your easy homemade Sushi Roll! Enjoy!


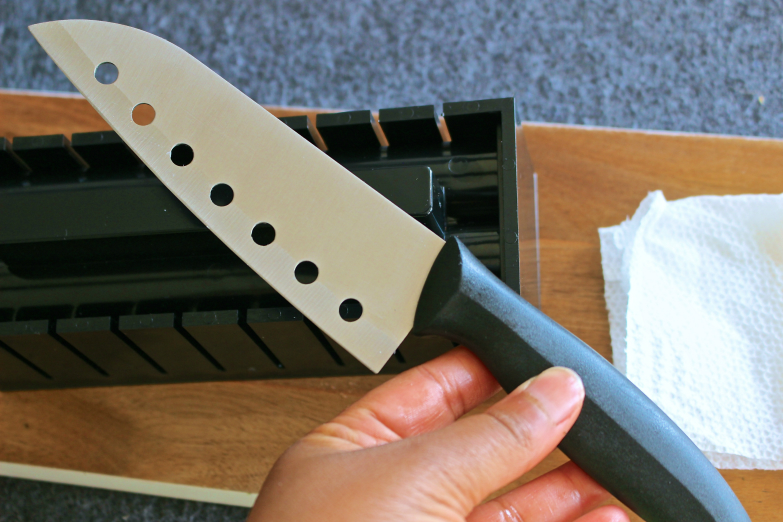
#6 Make Your Cuts :-D
The DIY Sushi Kit From Kitchen Boosterz comes with a perfectly sharpened knife ready for cutting!
To keep the rice from pushing out the sides, check out my YouTube Video (about 2min in) to see how to properly use the knife when cutting your sushi :-)


#7 Enjoy!!
Chop sticks make sushi taste so much better! :-D
Don't forget your Pickled Ginger, Wasabi, Soy Sauce (I use a soy sauce alternative), and any other bells and whistles you like with your Sushi!

Made with LOVE!
Sushi has never been easier!

Makes 4 Sushi Rolls Prep Time: 30 Min
Ingredients
Sushi Rice Recipe
1 Cup Short Grain (Sushi) Round Rice
1 1/4 Cup Water
3 Tablespoons Seasoned (Sushi) Rice Vinegar
Sushi Roll
4 Strips of Nori
8 Oz Sliced Thin Smoked Salmon (or None/Any fish of your choosing)*
Thinly Sliced Vegetables (Optional)*
Small Bowl of water for dipping hands in*
Directions:
Sushi Rice
- Rinse rice at least 8 times or until the water runs clear
- Bring water and rice to a boil
- Reduce heat to a simmer on low, Cover the pot and cook for 10 Min
- Turn off heat and leave pot uncovered for another 10 Min. DO NOT REMOVE LID during this time!
- Take lid off and fluff the rice with a fork. Water should be absorbed, rice should be tender and sticky.
- Allow rice to cool for at least 10 min
- Stirring constantly through each spoonful, drizzle Seasoned (Sushi) Rice Vinegar 1 tablespoon at a time until completely mixed into the rice.
Assemble sushi rolls with Sushi Kit - (All Steps 1 - 15 Pictured Above)
- Assemble desired shape + Frame
- Add Nori rough side up into desired sushi mold
- scoop 1/4 cup cooked sushi rice into mold and flatten it
- Place desired Ingredients on top of rice layer directly in the middle (do not over fill!)
- Add 1/4 cup cooked sushi rice on top. Pressing rice firmly together
- Carefully fold one side of Nori on top of the rice.
- Moisten fingers with water and wipe the water onto the Nori like a postal letter!
- Repeat with other side of Nori so that they stick together
- Use the desired cover mold of choice and press down on the sushi roll
- Remove cover and slice the sushi roll within the slicing guide lines, while holding the rest of the roll
- After the whole roll is cut, place the top cover mold on top of roll to keep in place while flipping the entire structure over
- Remove frame off of the mold shape base by pulling up on the frame
- Then remove the base to revel your easy homemade Sushi Roll! Enjoy!
Tips:
- If you can't find Seasoned (Sushi) Rice Vinegar- Combine 2 tablespoons regular rice wine vinegar, 1 tablespoon sugar, and 1/2 teaspoon salt in a small saucepan. heat until sugar and salt have dissolved. Makes Mixture for 1 Cup of Rice
- Do NOT put the rice in the fridge to cool! Patience grasshopper :-D... unless you want dry and damaged sushi rice!
- Room temperature rice is ready to use Sushi rice!
- Wooden bowls are recommended NOT metal bowls
- Sauce options: Soy, Teriyaki, Spicy Mayo, etc.
- Flavor options: Ginger, wasabi, etc.
- *Other types of fish for rolls: Salmon, Tuna, Yellow Tail, Sea Bass, Shrimp, Crab, Eel, and many more!
- *Types of thinly sliced vegetables: Cucumber, peppers, asparagus, endive, mushrooms, avocado, onion, lettuce, sprouts, and much more!
- Less is more when creating Sushi! Do NOT Over Fill your rolls
- For clean cuts, wipe knife on a wet towel between each cut!
- Easily Double this recipe over and over for a lot of mouths!